Showing posts with label EC2 Instances. Show all posts

Friday, August 23, 2013

How to Setup Amazon EC2 Instance and Install Virtalmin/Webmin part 2

This is the continuation of my tutorial on how to setup a amazon ec2 instance and Install Virtualmin/Webmin.

 http://techno-grub.blogspot.com/2013/06/how-to-setup-amazon-ec2-instance-and.html

As we go back to our previous tutorial.. we already done setting up the Amazon EC2 Instance and connecting it to our DNS to the IP that EC2 provide.. and also connecting it to our SSH client (for my example, im using Putty.

Ok now im going to explain the other part of my tutorial.. on how to install Virtualmin/Webmin to our EC2 server..


Since we already done connecting to our server.. the first thing you need to do is to update and upgrade your server.. to do this you need this following command..

      TO UPDATE :
            apt-get update
            or
            sudo apt-get update

      TO UPGRADE :
            apt-get upgrade
            or
            sudo apt-get upgrade

(updating and upgrading may prompt you to install something, just
allow it to install :D )

Then after that you need to change your timezone using this command..

      TO CHANGE TIMEZONE :
            dpkg-reconfigure tzdata

select your timezone ( for example "Asia/Manila")


After that we can now download the virtualmin.. to download virtualmin.. use this commands,

      wget http://software.virtualmin.com/gpl/scripts/install.sh

after downloading you can now install it.

      sudo /bin/sh/ install.sh

in order for you to run the webmin.. you need this following command

     service webmin start
     or
     sudo service webmin start

before you can access the virtualmin/webmin on your browser, you need first to open the port 10000 to your EC2 Security Group.. to do that you need to go back to your EC2 Management Console..

Under NETWORK & SECURITY > Security Groups

you can see there the list of security group your instance is belong.. example is "quicklaunch-0"
and for you to access it on your browser..

to add port just follow this image


https://YOUR_IP_HERE:10000

note : it needs to be https://


you will see this kind of warning message, but its ok just click "proceed anyway".

and you can now login..


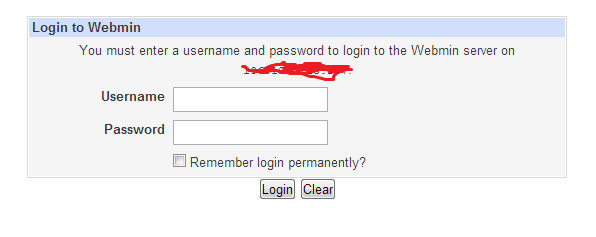
but since we only have our user name "root" and we don't have password for it.. (base on the part 1 tutorial). then we are going to add password for root. just go back to your SSH client and this command

      passwd

and it will ask you to input your password.. after that you can now login to your Virtualmin/Webmin.


and thats all.. hope it helps hehehe :D


Friday, June 7, 2013

How to Setup Amazon EC2 Instance and Install Virtalmin/Webmin part 1

Im going to share how I setup an EC2 instance in amazon server.. and after creating I also install virtual/webmin.. so here are the steps..

First you need to create an AMI instance in amazon EC2

1. Sign up here : http://aws.amazon.com/

2. Under Amazon Web Services Go to EC2 virtual servers in the cloud.

3. Under the EC2 Dashboard you will see a tab for INSTANCES(allcaps) and under it you will see Instances, click on that then on the Upper Right corner click Launch Instance, a box will popup 


4. Select the option button Quick Launch Wizard
  • Name Your Instance: (ex. Web_Production)  
  • Choose a Key Pair
    • Create New (name it anything you want, like me I name my keypair apache) then download (you need that keypair to connect to your server via SSH).
  • Choose a Launch Configuration :
    • Select  More Amazon Machine Images (if you select that there are thousands of AMI to choose) 
  • Continue
5. Search for "ami-6735f30e", it is a Debian Linux server running in 32 bit, it has a built-in virtualmin. select it and continue


6. the next popup click Launch.


Now that you successfully created an AMI Instance, Its time for you to Associate an IP and connect to your server via SSH

Associate IP

You need first to create an Elastic IP (this will become your website IP address, you will going to point your Domain in this IP, but later on we are going to discuss about that) , and to do that Go back to your amazon account

1. Under the EC2 Dashboard you will see a tab for NETWORK & SECURITY under it you will see Elastic IPs, click on that. then on the upper right corner click Allocate New Address, message will popup click Yes, Allocate

2. After you allocate new address, a new IP address will show right click on that IP and click Associate Select the Instance that you created then click Yes, Associate.

After that you can now start connecting to your server..


first you will need a SSH client, I am using Putty as my SSH client. now lets start to connect

Connecting you SSH client to your Server.

1. Open Putty
       Under Session :
           Host Name : (the IP you created earlier)
           Port : 22
2. Attach your Keypair -go to  Connection > SSH > Auth , browse for your keypair, then click Open

3. Black screen will popup.. (similar to cmd prompt of windows) , type root as username,

And there you have it you are now connected to your server.

For now im not going to finish this Tutorial because I have a lots for deadlines to work for.. im going to finish it later..

:)